




However, no machine is immune to wear and tear. Even the most robust rotary vane pump will experience performance degradation or failure if regular maintenance is neglected. In this guide, we’ll walk through the key maintenance practices, inspection intervals, and professional tips to keep your rotary vane pump running smoothly for years to come.
Why Maintenance Is Critical
Rotary vane pumps function through constant mechanical motion, compressing and exhausting gases using vanes that slide in and out of a spinning rotor. In many models, this motion is supported and sealed by oil that also serves as the “lifeblood” of the system.
This continuous operation means parts are exposed to heat, friction, gas contaminants, water vapor, and environmental debris. Over time, without proactive care, these stresses can cause:
- Reduced vacuum performance
- Oil breakdown and contamination
- Vane wear and sticking
- Seal and gasket degradation
- Motor overheating
- Costly unplanned downtime
Routine maintenance is not just about keeping your pump clean — it’s about preserving operational integrity, preventing performance loss, and avoiding expensive repairs or replacements.
Understanding the Pump’s Needs
Before diving into specific tasks, it’s important to understand that rotary vane pumps come in oil-lubricated and dry (oil-free) varieties. This guide focuses on oil-lubricated pumps, which are more common in industrial settings and more maintenance-intensive due to their use of circulating oil.
Each pump will also have a manufacturer’s manual with model-specific recommendations, including oil types, service intervals, and part numbers. Always refer to that documentation before beginning any disassembly or part replacement.
Daily to Weekly Maintenance (0–100 Operating Hours)
1. Check the Oil Level
Look at the sight glass (typically mounted on the side of the pump). The oil should be at the center of the viewing window or within the marked range. If it’s low, top it off with the correct vacuum pump oil — never use motor oil or hydraulic fluids.
2. Inspect Oil Condition
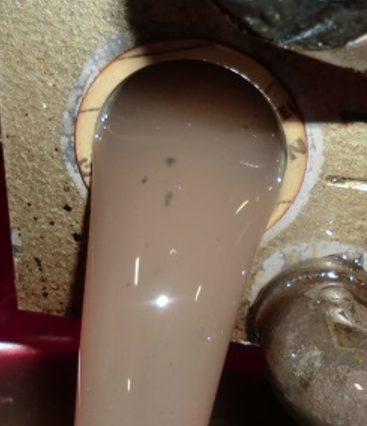
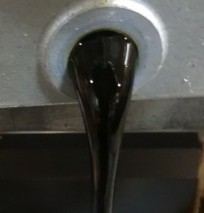
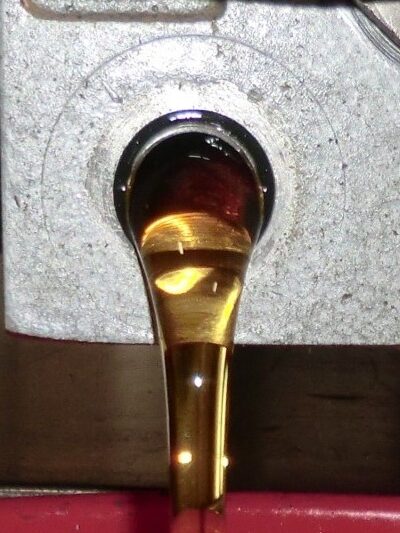
Clean oil will appear clear or slightly yellow. If you notice a milky or cloudy appearance, water contamination is likely. A dark or sludgy appearance indicates oxidation or chemical breakdown — both are signs that an oil change is needed.
3. Listen and Feel
Operate the pump and pay attention to how it sounds. A healthy pump will run with a smooth hum. If you hear rattling, knocking, or high-pitched whining, internal wear or vane issues may be developing.
4. Check for Leaks and External Damage
Inspect seals, hoses, gaskets, and the pump housing. Even small oil leaks can attract dust and debris, leading to contamination and performance loss.
5. Clean the Inlet Filter
A clogged or dirty filter can restrict air flow and overwork the pump. Remove the inlet filter and either clean or replace it, depending on its condition.
Monthly Maintenance (100–500 Operating Hours)
1. Perform an Oil Change
To maintain effective sealing and cooling, change the oil at regular intervals — typically every 300–500 hours for clean applications, and more often if you’re pumping moisture or solvent vapors. For best results:
- Warm the pump slightly before draining (this helps suspend contaminants)
- Drain completely and allow time for thorough emptying
- Refill with fresh, manufacturer-recommended oil
Some technicians also perform a flush by adding a small amount of clean oil after draining, running the pump briefly, then draining again before the final refill.
2. Inspect Vanes and Rotor (if accessible)
While this step isn’t always required monthly, it’s smart to periodically check the vanes for wear, especially if you’ve noticed performance issues. Worn vanes can stick, chatter, or fail to seal, reducing vacuum efficiency.
Quarterly to Annual Maintenance (500–2,000 Hours)
1. Replace Vanes and Seals
Vanes wear down over time and lose their ability to form an airtight seal. Some pumps feature vanes that can be inspected without full disassembly, while others may require more extensive teardown. Replace vanes if they’re below the minimum thickness specified in the manual or show signs of chipping or uneven wear.
Replace gaskets and seals to ensure vacuum integrity, especially in pumps that have been exposed to chemicals or high heat.
2. Inspect the Motor and Coupling
Misalignment, motor wear, or loose couplings can cause vibrations and noise that shorten pump life. Check for unusual heat, excessive noise, or reduced motor speed — all signs of deeper mechanical issues.
3. Check Oil Mist Filter or Exhaust Filter
Oil-lubricated rotary vane pumps often release small amounts of oil vapor during exhaust. Many models include a mist filter to reduce this. Replace it when saturated or per the manufacturer’s recommendation.
Signs of a Problem
Staying ahead of issues means knowing what trouble looks (and sounds) like. Keep an eye out for:
- Sudden drop in vacuum performance
- Pump runs hot or shuts down prematurely
- Excessive smoke or oil mist at exhaust
- Loud or irregular noises
- Oil consumption is increasing rapidly
- Persistent leaks or strong odors
Addressing these early can save you the cost of a full rebuild later.
Expert Tips for Long-Term Care
- Use the Right Oil: Always use oil specifically formulated for vacuum pumps. Generic oils can foam, oxidize, or fail under vacuum.
- Operate in a Clean Environment: Keep the pump area free from dust, debris, and corrosive gases. Use gas ballast features when pumping vapors to help expel contaminants.
- Label and Log Everything: Keep detailed records of oil changes, inspections, and part replacements. It helps with scheduling and troubleshooting.
- Train Your Team: Improper handling can undo months of good maintenance. Make sure everyone who uses the pump knows the basics.
Conclusion
Rotary vane vacuum pumps are tough machines — but even the toughest need care. With routine attention to oil changes, vane condition, filter cleaning, and part inspections, you can keep your pump running smoothly and reliably for years. Regular maintenance doesn’t just protect the pump; it protects your entire operation from unexpected downtime and costly repairs.
Whether you’re running a lab vacuum oven or a packaging line, a few hours of preventive care can save you thousands in the long run. Treat your pump well, and it’ll return the favor.